


In the coming weeks, I hope to little segments of how my fantasy figures are created. Below you will see the steps in creating a face to the finished fairy. I do each creation's face individually.
 STEP #1 - PLACEMENT OF FEATURES
After the head is sewn, using 100% silk tussah fabric (tussah silk is silk which comes from wild moths, whose main diet is oak leaves, I draw the placement of the features using a Micron pen, size .005. The natural colors of tussah silk range from a light cream, to a darker tan color, depending upon the amount of tannin in the leaves. The face above has been hand-dyed to obtain this shade of brown.

STEP #2 - NEEDLE SCULPTING
The head is then sewn onto the body using 2lb clear fishing line. I lightly needle sculpt each face using a clear light weight quilting thread. I start at the bridge of the nose, and then going into the corners of the mouth, and to the outer edges of the eyes. The unique facial expression is derived from how the needle is worked with the stuffing and the tension applied. This is how each of my creations end up with their own unique personality, and charm!

STEP #3 - PAINTING THE FACE
Using a size 18/0 brush, and acrylic paints, I paint the face. The eyelashes and eyebrows are then drawn on with the Micron pen - .005. The cheeks get an application of blush, and the upper brows get an application eye shadow in a shade to match their eyes. After the face is completely painted, I spray it with a Krylon matte finish sealer for protection of the colors. A final application of a crystal clear lacquer goes on the eyes and the lips, which gives them a 3-dimensional look and a bit of shine.

STEP #4 - FINISHED FACE WITH HAIR APPLIED

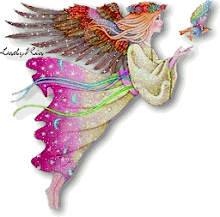
FINISHED FAIRY
The above steps are just a small portion of what goes into creating one of my completed figures. Do stop back for a visit, as I hope to have other processes out here in the coming months.


No comments:
Post a Comment