


STYLING A FAIRY'S HAIRDO!
 I will be sharing, out here, some of the fun, fantastic, colorful yarns, which I use to create the hair styles of my one-of-a-kind fantasy creations. I have a huge selection of many wonderful yarns, with unique textures, and colors!
I thought I'd start with the figure above. She has been sewn, stuffed, sculpted into her sitting position, her accents have been sewn on, her face has been individually, hand-drawn, painted and needle-sculpted. She is now patiently waiting to get her hair put on!
or this figure, who when completely finished, will be a "fairy", I have selected two different yarns, which I combined to create her fun, colorful hairdo. The one yarn is an Italian yarn, whose texture is soft, wispy eyelash, with "poofs", and the other yarn is also an Italian yarn, which has soft, wispy eyelash and multi-colored thread running through it.
 The photo above shows the two yarns blended together. Below you will see a photo of the two balls of yarn and the soon to be fairy. I drape the yarn over the head to get an idea of how long I want it to be. After, I determine the length, I fold it back and forth until I get a "hunk" of it in the thickness that I want. (As shown in the above photo)
 After I have the "hunk" or section of yarn to be used for the hairdo, I take a piece of the two combined yarns, and tie it around the center of the "hunk" of yarn several times and knot it. Next, I place the center of the "hunk" of yarn on the top of the fairy's head. Using 4#, clear fishing line, I then sew the yarn to the center of the head....securing it tightly!
  In the photo above, I have already sewn the center of the "hunk" of yarn to the top of her head. The next step was to apply a bit of Fabric-Tac, the permanent adhesive I use to "style and shape", the hair around the fairy's face. (I tried to get my husband to photograph this step...but...somehow it didn't work!) The adhesive is applied around the outer each of the face, and then you can press the yarn into place. I decided to give this fairy a side braid style hairdo, so I pulled the yarn to one side, and then I sewed it several times, where you see my fingers holding the yarn, to secure it.
  Above is the back side of the hairdo. I use a combination of stitching the yarn in place, and also the permanent adhesive, to firmly secure the hair to the back of the entire head. The other side of the face also gets an application of the adhesive so that the yarn can be shaped to her face. She is now ready to get her hair accents sewn on, and then her wings.
I will be adding her finished photo, to this post, so do stop back to see her. I will also be doing another addition to this post showing how I use a "hair loom" to design a shorter style hairdo, and also show some of my gorgeous yarns used in the creation of other fairies and mermaids.
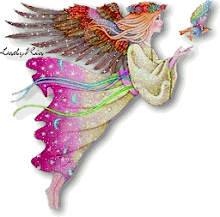
 Here she is all finished! It is a bit hard to see in the photo, but she has a hair accent of three strands of Swarovski crystals, and tiny glass and metal seed beads strung on copper colored wire. Come back to see my next post showing how I create a "short" hairstyle using my hair loom.


1 comment:
Oh,poor doll!She looked so sad without hair!Hi!I've been too busy to comeback to visit your blog!But today I manage to get some free time and I'm surfing favourite blogs!
Post a Comment